|

|


THE EVENT
So there you are, at another volleyball tournament with your new camera wondering
why you aren't getting the good shot of your son or daughter at the decisive
moment of the game. You may have spent a lot of money on that camera just
so you could take some great shots of your athletic offspring. And why not?
Volleyball is a great athletic event that can yield a lot of dramatic, colorful
and emotional pictures of excellent competition, most with young athletes
at the height of their physical ability. It is only fitting that we try to
capture this event on film or digital pixels. So what are the basic steps
to getting good images?
LIGHTING
Most volleyball games are held indoors where the main component to a good
image, lighting, is usually less than favorable. Some high school gyms have
lighting that dates back a few years and will really test your ability even
with high end equipment. To get good images in the relatively low lighting
of a gym, convention center, or where ever your event takes place, you need
a few basic elements of photography to get a usable picture. Among these are
a fast lens to let in as much light as possible, a high ISO setting - the
light sensitivity setting of your camera, and a shutter speed fast enough
to stop most of the action in the image. If you have a camera that will allow
manual adjustment of these settings, all the better as you can limit the poor
exposures with proper manual setting of these variables.
ISO
On any camera you would need to set a high ISO (1000 to 3200 or higher), open
the lens to its widest aperture (smallest f-stop number) and try to have a
shutter speed of 1/250 or faster as lighting and conditions allow. You can
then check the results in the LCD window on the back of your camera and fine
tune until the image looks properly exposed. If you are using film, ISO 800
and even 1600 films are available from your camera store. These are very basic
guidelines toward getting a good image. Many other elements of picture taking
also come into play to get a good image.
LENSES
If you are using an SLR or DSLR with interchangeable lenses, you would want
to use the fastest lens you have. Fast lenses usually have f-stops of 2.8
or smaller, like f2 or f1.4. At many venues even f2.8 can seem like a very
slow lens when shooting sports indoors. Personally I like to use a fixed-focal
length lens simply because they are faster and sharper than most zooms. They
are also easier to work with as you don't have to adjust a zoom setting and
can concentrate on the image rather than the technical aspect of working the
lens.
A good start is the basic 50mm f 1.8 or 1.4 lens that might come with your camera. This is a good focal length to shoot from the sidelines to get most action including setting, digging and hitting and general overall action images. For closer action shots, a medium telephoto lens is needed. An 85mm or 100mm lens is a good choice. You can still shoot comfortably from the sidelines or the seats and get the action. If you are standing at the back of the court, good overall action shots and player interaction on the court can also be photographed.
For really close and intense action a longer telephoto lens is needed usually a 135, 200 or 300mm lens with a fast f-stop opening. You might also want to use a monopod when using some of the heavier and longer lenses to steady the shots. If you are using image stabilization lenses, just remember they only work on minimizing movement of the camera and not your subject. To keep your images interesting, try to vary the visual perspective by using different lenses, from wide angles to telephotos. You might find that shooting with only one lens will make all your pictures look very similar and added variety will make all images look more appealing.
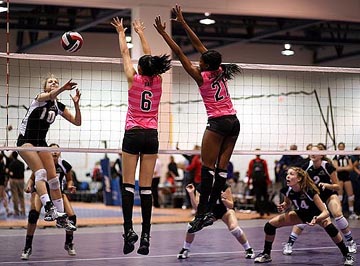
FOCUSING and POSITIONING
Volleyball shots can be a challenge for any auto focus system. For most unobstructed
pictures like shooting the back row players from the sidelines or the setter
from across the court, AF will do an excellent job. However, to take a picture
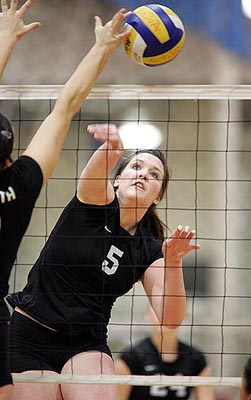
of hitting or blocking action at the net and capture facial expression you
need a medium to long telephoto and most likely manually set focus. Standing
toward the back of the court you can manually adjust the lens focus to a point
just on the other side of the net where the hitter or blocker will be positioned
and leave it there. Whatever action takes place with players facing you at
the net should be in focus. If you were to use auto focus, the camera may
lock onto the net and the image of the athlete behind the net will be soft
or out of focus. In some cases at some tournaments, you may not be allowed
to take pictures from the back of the court in which case try shooting from
the corners, usually the one not occupied by the corner ref.
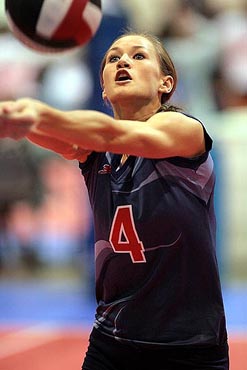
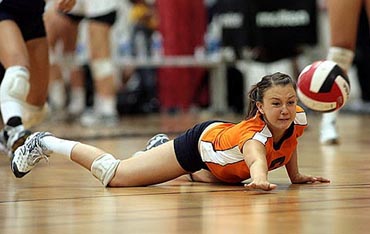
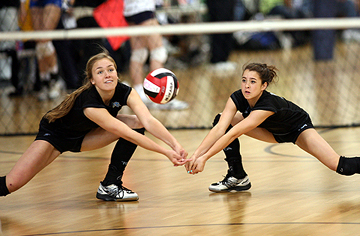
Shooting from the sidelines is a good spot for capturing facial expressions, ball passing and digging. Good digging shots are difficult to come by as they can occur at any location on the court, even at the net. They can be low or high, at an angle or coming directly towards your camera. This unpredictability will challenge any photographer and can make those images a particular prize to get. Auto focus might not be quick enough to get these grab shots. Manual focus might get you there if you are prepared and anticipating the fast action at such close range. A camera or lens with manual override is very helpful in these situations.
THE DECISIVE MOMENT
Most sports photography is all about timing. Many aspects of sport are predictable
and you can use that predictability to get good pictures at the decisive moment.
If you can anticipate the next move, odds are you will have a better chance
at getting that picture. Sure, we can set the camera at the fastest frame
rate as possible, press the button and hope one of the many shots we just
got will tell the story. You may have a good shot or you may just be playing
shutter roulette and have many out of focus images. It is better to work on
timing and shoot for the decisive moment because most of us don't shoot with
a 10 frame per second camera.
ISOLATE THE SUBJECT
Most good dramatic sports pictures are shot with the lens wide open. This
is done for several reasons. First, you need all the shutter speed you can
get to freeze the action, which means the lens will have to be at its widest
or fastest f-stop setting to maximize shutter speed and, just as important,
you want to isolate the subject so that your subject really stands out in
the image. With the aperture wide open, the depth of field of the lens is
shallow, limiting the focus area only to your subject. This is especially
valuable at a volleyball game where there are many distractions going on in
the background. Nothing ruins a good image more than to have the background
be distractingly recognizable and unrelated to the subject of the image. This
is probably the most common mistake seen in sport pictures taken by non-pros.
A subject that is in-focus and isolated from the background will stand out
and be remembered as a good picture. The drawback to limiting the depth of
field is that it may result in fewer in-focus images, however those that are
in focus will be outstanding and definite keepers. Just remember when shooting
digital, it doesn't cost you to shoot more pictures.
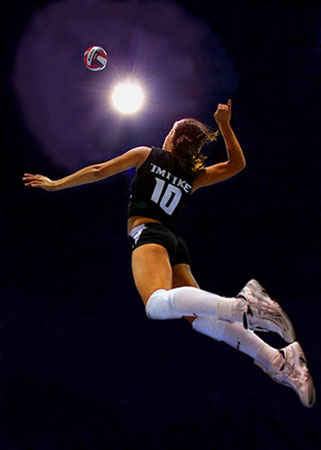
IMAGE ORIENTATION
Shoot vertical or horizontal? This decision is based entirely on personal
preference. Some images are better shot vertically such as an individual player
on the court or a player serving the ball. Other images are better as a horizontal
as they will include more players in the picture and give a better look at
the set-up on court or the image may just call for horizontal composition
such as a digging shot.
SET UP
Due to the nature of the sport, flash photography is usually not allowed as
it may temporarily distract a player. Unless you are shooting a collegiate
game where the strobes are installed in the rafters and the light is coming
straight down, you will want to shoot with the limited available light. So
to recap, indoors try to use manual setting of f-stop and shutter on the camera,
set the lens to its fastest aperture, the ISO to a high setting and an appropriate
shutter speed to insure good exposure. A very good indoor volleyball set up
would be a DSLR, a 50mm F1.4, 85mm f1.8 and 135mm F2 lens. With this set-up
you are ready to shoot anywhere indoors. In most gyms, the camera would be
set at ISO 1200 or 1600, lens at F2 and shutter speed at 1/500. Better gyms
and some convention centers will have newer lighting systems that will allow
more optimal camera settings.
MY GAME
When shooting volleyball I try to travel as light as possible to stay mobile
and decrease fatigue when carrying photo gear for several days of a tournament.
That means 2 camera bodies, and three lenses, usually a 24mm, an 85mm and
a 200mm. I have a variety of other lenses to choose from which I may bring
occasionally just to mix up the image perspective or get an unusual angle
or look to an image. My set-up for collegiate games is different as the lighting
is usually much better and you are farther away from the action. To keep it
light I sometimes add a 1.4 teleconverter to add variety to a long telephoto
lens.
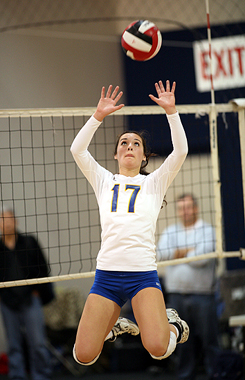
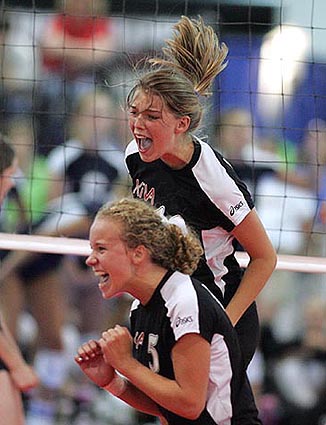
In my personal experience, serving shots are the easiest, followed by bumping/passing shots, the setter setting the ball, net action and digging. Also don't forget what happens after the action, the facial expressions after a kill or good dig, the benched players reaction to plays and the coach emoting over a ref's call.
When shooting matches I also tend to look for good multiple player action. Sometimes just a nice colorful uniform will catch my eye for some shots. Other times a good athletic player will make me stop and shoot. Always trying to get some net action, good setting, passing, serving and digging. Add a few personality shots or off-court pictures and the shoot is complete. Then the hardest part is editing the images afterwards. I immediately trash any soft or out-of-focus and non-content shots, followed by all images that do not make a player look good. That means technically bad form, goofy, embarrassing and awkward positions or expressions are permanently eliminated from consideration. After that, choosing a few pictures for display gets a little bit easier.
This short treatise
has been limited to indoor photography since almost all of my emails requesting
picture-taking information are about problems shooting indoors.
Most of the points here will also apply to many other indoor sports and events
so
hopefully this very basic information will help some of you achieve better
pictures from your equipment in challenging lighting conditions. Contact me
for specific information or help. Thanks for visiting this website.
julian@biggirlinthemiddle.com
|
|